Have you ever been so excited about a new piece of fitness equipment, but when you finally got it you had no idea where to start with it? Yeah, me too.
Yoga straps are incredibly useful to assist with general flexibility, advanced poses, binds and holds, if you do not already have one, it is a fantastic addition to your practice. Any strap will work, my first one was from Walmart, but always look into your options so you get the one best fit for your needs! How to effectively integrate your strap into your practice opens up so many new ways to progress!
The most basic of the yoga straps consists of one long strap with two rings on one end that allow you to adjust the size of the loop you need. Materials vary from strap to strap, but this is what you’ll see most often.
My favorite straps are the loopy straps because they provide extra security in holds so my mind isn’t occupied thinking of slipping and I can focus all my energy into sinking into my pose pose. Talk about a zen moment. 🙂
Now let’s get down to business. Here are 8 of my favorite, basic stretches to integrate into your yoga practice!
Shoulder Mobility
These movements are perfect for warming up the shoulders and opening the chest before an upper body workout or an inversion work. Take it slow and start with your hands wide, once your muscles warm up a bit bring them closer so you feel the stretch during the full rotation.
Exercise 1: Front and back shoulder rotations
In a kneeling position, hold the strap taught in front you with the hands wider than the shoulders. Keeping the arms straight, slowly raise the strap above your head then behind to the hips. Continuing the motion, bringing the hands back to the front. Complete at least 8 rotations.


Exercise 2:
Place the hands slightly wider than the hand placement in exercise one. Holding the left hand in place, bring the right hand up to the left and behind to the right hip. Guide the left arm in a similar motion starting by bringing it behind and up to the right then down to the left hip. (shown below)


The yoga strap should start in front, after the right arm circle be behind, and finish the left arm circle back in front.
Quads and Hip Flexors
These two are incredibly simple to integrate into a simple flow and ridiculously effective! Quads and hip flexors are so important to stretch out, especially for athletes and those with careers requiring to be on your feet. These muscles are used every day, give them some love!
Exercise 3: Low lunge quad stretch
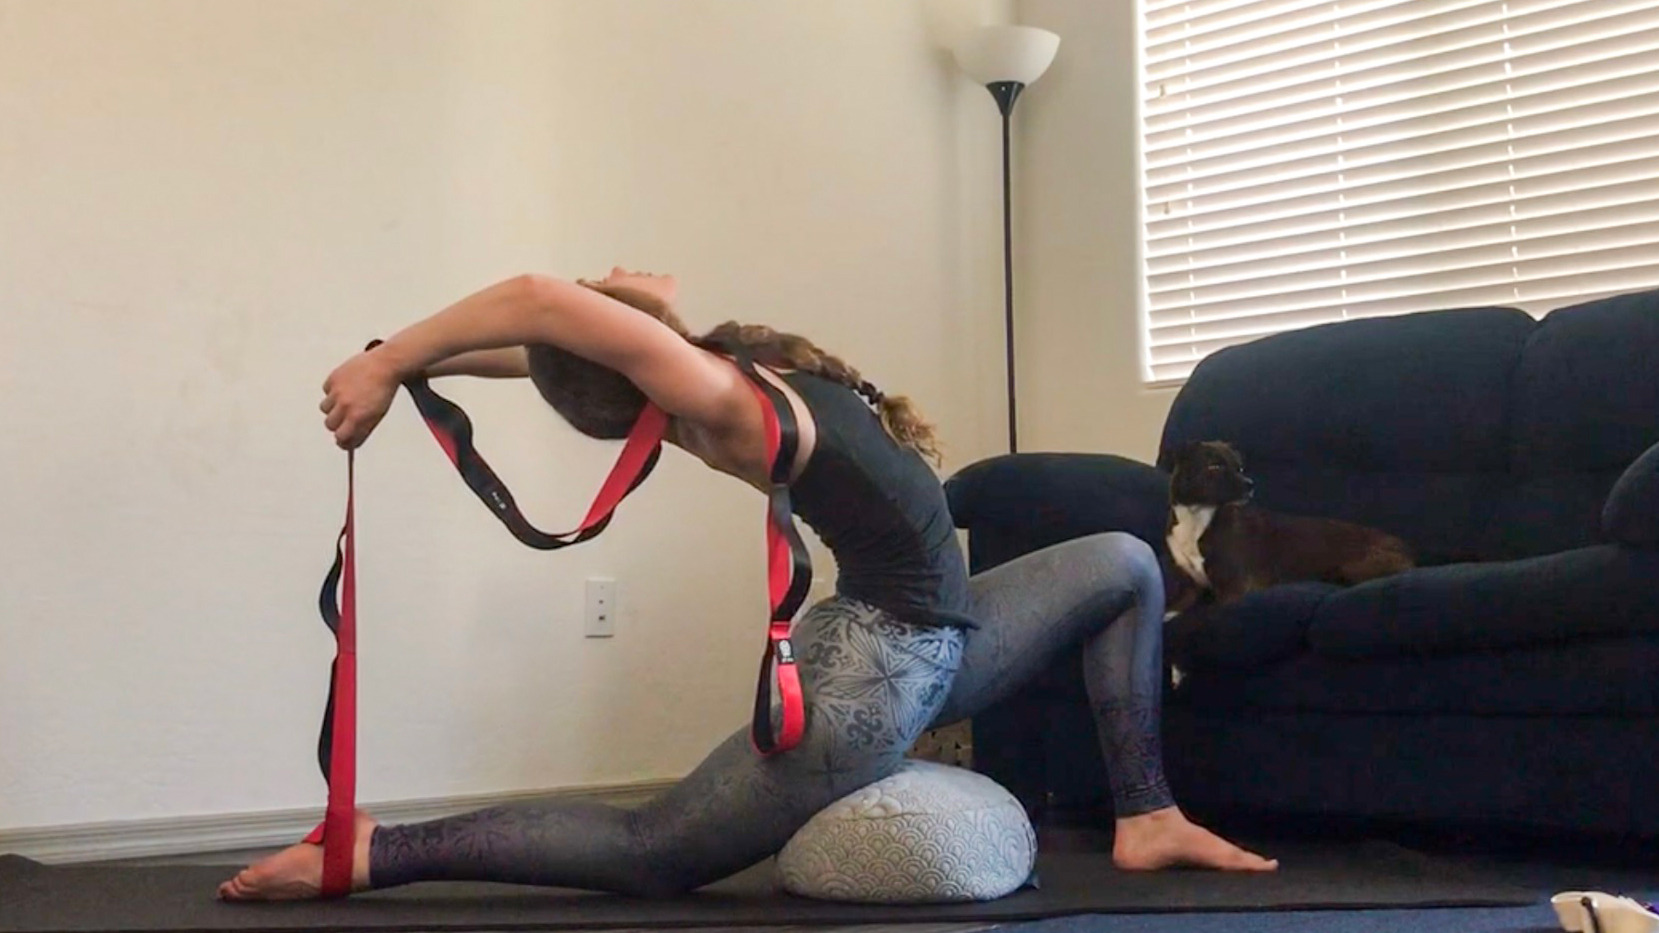
Run through a few rounds of low lunge to single leg forward fold on each side to warm up the muscles. Loop the strap around the back leg and drape it over your shoulder. As you relax the hips down, tighten the strap to stretch the quad. Struggling with balance? Use a wall for support.
TIP: If you have sensitive knees, roll your mat a few times for additional support for the resting knee.

Exercise 4: King Pigeon

Begin in a regular pigeon pose with the strap looped around the back foot, draped over the shoulder on the same side. Reaching the hands behind, grab the strap and begin to close the distance between the hands and foot.
Back Bends
So many possibilities for strap assisted backbends! These two integrations are great to prep for a full wheel.
Exercise 5: Low lunge w/ back bend
Using the same approach as our low lunge quad stretch, keep the back leg straight, top of the foot pressed into the mat, straighten the arms and use the strap to guide yourself to a backbend you’re comfortable in.

Exercise 6: One-legged upward bow pose
One legged upward bow pose: Lay belly down on the mat, legs extended straight back, and place a bolster or rolled blanket under the torso for support. Loop the strap around a foot, flip your hold, and use the strap to guide yourself to a comfortable backbend.

Balancing Poses
Using your yoga strap while standing will allow you to comfortably practice the balancing pose whatever level you are at the moment. Remember, as we practice we continuously get better.
TIP: Having trouble balancing? Practice next to a wall for extra balance!
Exercise 7: Extended hand to toe pose
 Begin standing with the feet together, pressing into all four corners of the feet. Loop the strap around one foot and lift the knee to a 90 degree angle with the hip. Take a moment to gain control here, then extend the leg in front of you, then guide the foot to the side of the body. Extend the opposite arm wide for extra balance. Hold for at least four slow breaths, release the strap and control the leg down.
TIP: Tuck the tailbone and engage the abs for stability.
Exercise 8: Dancer pose
 Dancer pose is perfect for strap modifications! Begin standing with both feet together, pressing all four corners of the feet into the mat. Loop the strap around one foot and lift it behind you, as you balance begin to lift the leg and arms as you shorten the strap. Keep all limbs engaged, actively pushing up and away with arms and lifted leg.
TIP: Warm up the legs with some split drills, when you practice dancer pose you may notice it is easier to balance while lifting the foot higher.
Practice these eight exercises until you get comfortable with your yoga strap, then explore! Get in the habit of bringing out your strap each time you roll out the mat, having it by you makes it easy and convenient to integrate strap more frequently into your practice.
Whether you are new to using your yoga strap or are looking for ways to spice up your practice, never be afraid to get creative with ways you can use your strap. When I am lacking creativity, I pop onto Instagram and search for some inspiration then try to recreate it! The beauty is that you can integrate yoga straps wherever your practice goes.
Thank you for stopping by and taking some time to practice with me. Drop a comment to let me know what you think.
Blessings,
Kelsey Ann

